 Skip to content


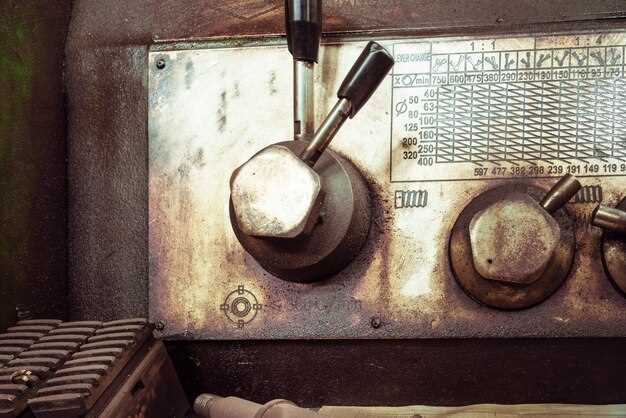
Restoring the electrical systems of a classic Porsche 911 requires a thorough understanding of the vehicle’s intricate design and the components that contribute to its overall functionality. The heart of the electrical system lies in the fuse box, which protects essential circuits from overload. Each fuse serves a specific purpose, ensuring that critical systems such as lighting, ignition, and instrumentation operate smoothly.
As time takes its toll, the wiring within the Porsche 911 can deteriorate, leading to potential issues such as shorts and unreliable performance. Inspecting the wiring harness for signs of wear and damage is crucial to maintaining the integrity of the electrical system. Replacement or refurbishment of degraded wiring not only enhances performance but also prevents more significant electrical failures down the road.
Proper restoration of these components involves meticulous attention to detail and a comprehensive approach to troubleshooting. By ensuring that the fuse box is in good condition, securing proper connections, and replacing faulty wiring, classic car enthusiasts can breathe new life into their beloved Porsche 911s, safeguarding the vehicle’s heritage while ensuring a thrilling driving experience.
Diagnosing Common Wiring Issues in Classic Porsche 911 Models
Diagnosing wiring issues in classic Porsche 911 models requires a systematic approach. Many electrical problems stem from age-related deterioration of the wiring, which can result in various malfunctions. Start by visually inspecting the wiring harness for any signs of fraying, cracking, or corrosion. Pay close attention to connection points, particularly in the engine compartment, where heat and moisture can lead to degradation.
Next, utilize a multimeter to check for continuity in the wiring. This tool is essential for identifying breaks in the circuit. Test each wire individually, especially those that connect to the main fuse box. If a specific wire shows no continuity, it may need replacement or re-soldering, depending on the damage extent.
Grounding issues are common in classic Porsches and can cause a range of electrical failures. Ensure that all ground connections are clean and tight. Check the ground straps connecting the engine to the chassis, as poor grounding can lead to erratic behavior of electrical components.
Additionally, it’s crucial to examine the fuse box for burnt fuses or corroded contacts. Replace any damaged fuses and clean the terminals to ensure a solid electrical connection. Be sure to refer to the wiring diagram specific to your model year, as this will help you trace circuits and identify components accurately.
Lastly, consider the presence of any aftermarket electrical components that may have been added over the years. These can sometimes introduce complications into the existing wiring system. Ensure that any additional wiring is integrated properly and does not interfere with the original wiring design. By following these steps, you can effectively diagnose and address wiring issues in classic Porsche 911 models, ensuring reliable electrical performance.
Step-by-Step Guide to Upgrading the Fuse Box in Classic Porsche 911
Upgrading the fuse box in a classic Porsche 911 is an essential step for enhancing the reliability of the electrical system. A modern fuse box can reduce the risk of failure and improve overall performance. Follow these steps for a successful upgrade.
Step 1: Gather Necessary Tools and Materials
Before starting, ensure you have all required tools, including a multimeter, wire strippers, electrical connectors, and a new fuse box compatible with your Porsche model. Having these items ready will streamline the process.
Step 2: Disconnect the Battery
Safety is paramount. Begin by disconnecting the negative terminal of the battery to prevent any electrical shorts during the upgrade process.
Step 3: Remove the Old Fuse Box
Locate the existing fuse box, typically situated under the dashboard. Carefully document the wiring connections for reference. Remove the old fuse box by unscrewing it from its mount, and gently detach the wires, ensuring not to damage the existing wiring harness.
Step 4: Prepare New Fuse Box
Before installation, consider labeling the terminals on the new fuse box to match the wiring from the old setup. This will help maintain proper connections with the corresponding circuits.
Step 5: Connect Wiring to the New Fuse Box
Begin connecting the wiring to the new fuse box. Ensure each wire is securely fastened and that the appropriate gauge wire is used to prevent overheating. Double-check the alignment based on your reference documentation.
Step 6: Install the New Fuse Box
Once all wires are properly connected, mount the new fuse box in the designated area. Make sure it is securely attached and that there are no obstructions around it that could lead to damage.
Step 7: Reconnect the Battery
With the new fuse box installed, reconnect the negative terminal of the battery. This will allow you to test the new system for functionality.
Step 8: Test Electrical Systems
Finally, test all electrical systems in your Porsche to ensure everything operates correctly. Check lights, signals, and other components associated with the fuse box to confirm that the upgrade was successful.
Upgrading the fuse box in your classic Porsche 911 not only modernizes the wiring but also enhances safety and reliability. Follow these steps to ensure a seamless transition to a better electrical system.
Tips for Maintaining and Protecting Wiring Harnesses in Classic Porsche 911
Maintaining the wiring harnesses in your classic Porsche 911 is essential for ensuring optimal performance and reliability. Here are some effective tips to help you protect and maintain these critical components:
- Regular Inspection:
Regularly check the wiring for signs of wear, damage, or corrosion. Look for frayed wires, cracked insulation, or signs of overheating.
- Use Quality Materials:
When replacing any wiring, use high-quality, automotive-grade materials that can withstand temperature fluctuations and environmental factors.
- Protective Sleeving:
Consider using protective sleeving or heat-resistant tubing around critical sections of the wiring harness to guard against abrasions and heat damage.
- Keep the Wiring Box Dry:
Ensure that any wiring boxes are sealed and kept dry. Moisture can lead to corrosion and electrical failures.
- Avoid Sharp Edges:
When routing wires, avoid sharp edges that could cause insulation damage. Use grommets or protective guides where necessary.
- Secure Fastening:
Ensure wiring harnesses are securely fastened with clips or ties to prevent movement that can lead to wear over time.
- Check Connections:
Regularly inspect all connections for looseness or corrosion. Clean connections using appropriate cleaners to ensure good conductivity.
- Document Modifications:
If modifications to the wiring system are made, document them thoroughly to maintain clarity during future maintenance.
By implementing these tips, you will prolong the life of the wiring harnesses in your classic Porsche 911, ensuring safe and reliable driving experiences for years to come.


