 Skip to content


Rebuilding the engine of a Porsche 911 is more than just a mechanical task; it is an art form and a journey into the heart of automotive restoration. The iconic status of the 911 comes not only from its performance but also from the engineering excellence embodied in its engine. Understanding the intricacies of this powerhouse is essential for any car enthusiast aiming to breathe new life into their classic model.
The process of engine restoration requires meticulous attention to detail and a systematic approach. Each component plays a vital role in the overall performance and longevity of the engine. From the cylinders to the camshaft, every part must be assessed, cleaned, or replaced, ensuring that the engine achieves optimal function. This guide will take you through the essential steps to rebuild a Porsche 911 engine, providing you with the knowledge and confidence to tackle the project.
As you embark on this journey, it’s crucial to approach the task with both passion and precision. Rebuilding your 911’s engine not only enhances its performance but also deepens your connection with the car’s rich heritage. Whether you are a novice or a seasoned mechanic, this comprehensive guide will serve as a valuable resource, empowering you to successfully restore one of the most celebrated engines in automotive history.
Choosing the Right Tools and Parts for Your Porsche 911 Engine Rebuild
When embarking on a restoration of a Porsche 911 engine, selecting the correct tools and parts is essential for a successful rebuild. First and foremost, ensure you have a comprehensive set of hand tools. Standard wrenches, sockets, and screwdrivers will be invaluable. Additionally, a torque wrench is critical for tightening fasteners to the manufacturer’s specifications, preventing future engine failures.
Specialized tools also play a significant role in the rebuild process. Investing in a quality engine stand allows for easier access during assembly. A timing light is crucial for ensuring proper ignition timing, while a valve spring compressor will assist in working with the cylinder heads. Don’t overlook the importance of a good set of measuring tools, such as calipers and micrometers, to check tolerances and ensure your components are within specifications.
When it comes to parts, prioritize quality over cost. OEM (Original Equipment Manufacturer) parts are typically the best choice, as they are designed specifically for your 911 model and ensure compatibility. Aftermarket alternatives can be viable but always research their reliability and performance history. Essential components include pistons, rings, bearings, and gaskets; ensure they match your engine type and model year.
Alongside engine components, consider refreshing ancillary parts such as the fuel injectors and oil pump, which are critical to engine performance. Regularly replacing old seals and gaskets will prevent future leaks and ensure longevity. Don’t forget to inspect and, if necessary, replace external components like hoses, belts, and filters during the rebuild.
Lastly, create a detailed checklist of needed parts and tools before starting the project. This will help streamline your restoration process and prevent delays caused by unexpected parts shortages. With the right tools and quality parts, your Porsche 911 engine rebuild will not only restore the vehicle’s performance but also enhance your overall driving experience.
Disassembling the Engine: Key Techniques and Precautions
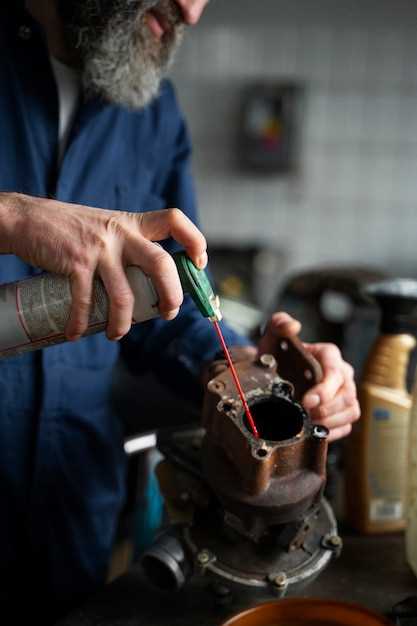
Disassembling a Porsche 911 engine requires careful planning and execution to ensure a successful rebuild. Start by organizing your workspace, gathering necessary tools, and preparing containers for parts. Clearly label each component as it is removed, facilitating an efficient restoration process. Utilizing a digital or physical notebook to document each step can also aid in recalling specific procedures during reassembly.
Prior to beginning disassembly, ensure you have a complete service manual for your specific engine model. The manual provides critical information on torque specifications, timing settings, and assembly sequences. Additionally, wear safety gear such as gloves and goggles to protect against sharp edges and harmful substances.
Begin by disconnecting the battery and draining all fluids to avoid any hazards. Carefully remove the intake and exhaust systems, taking special care not to damage any gaskets or sensors. Using the correct size tools is essential to prevent stripping bolts, and a torque wrench is invaluable for reassembly.
When removing the engine from the chassis, consider enlisting a helper or employing an engine hoist. This reduces the risk of injury and damage to components. Pay attention to the arrangement of connections and wiring, ensuring they are labeled or photographed for reference during reinstallation.
As you take apart the engine, inspect each part for wear and damage. This assessment will help determine what needs to be replaced or refurbished during the rebuild. Keep track of all fasteners and small components, as losing any piece can complicate the restoration process significantly.
Finally, maintain an orderly workflow, working systematically from the outside in. This approach helps prevent confusion and minimizes the risk of misplacing parts. Following these techniques and precautions will streamline the disassembly process, paving the way for a successful Porsche engine rebuild.
Reassembly and Testing: Ensuring Optimal Engine Performance
After completing the disassembly and restoration of your Porsche 911 engine, attention must turn to the meticulous process of reassembly. Proper reassembly is critical in achieving optimal engine performance. Begin by ensuring that all components are clean, free of debris, and lubricated where necessary.
Step 1: Component Verification
Before reassembly, verify that all parts are accounted for and in good condition. Check for any signs of wear or damage on components such as pistons, bearings, and gaskets. Replace any worn parts to ensure the engine’s longevity and performance.
Step 2: Sequential Assembly
Reassemble the engine in a step-by-step manner, adhering to the manufacturer’s specifications. Start with the crankshaft and connecting rods, followed by the pistons. Each component should be torqued to the specified values to maintain integrity under operating conditions.
Step 3: Installing the Cylinder Heads
Install the cylinder heads with new head gaskets to prevent leaks. Ensure that the head bolts are tightened in the correct sequence and to the correct specifications. This step is crucial for maintaining an optimal seal and achieving efficient combustion.
Testing the Engine
After reassembly, rigorous testing is necessary to ensure the engine is performing as expected. Start with a visual inspection for any leaks or irregularities. Once everything appears secure, connect the engine to a diagnostic tool to verify electrical and sensor functionality.
Step 4: Initial Startup
During the initial startup, listen for any unusual noises that may indicate issues with assembly. Monitor oil pressure and temperature closely. Allow the engine to idle and gradually reach operating temperature while watching for any signs of leaks or erratic behavior.
Step 5: Break-in Period
After the initial startup, a break-in period is essential. This phase allows engine components to wear in properly and settle. Follow the specific guidelines for break-in provided by manufacturers to avoid excessive wear or damage.
Step 6: Final Testing
Once the break-in period is complete, conduct comprehensive testing to assess performance metrics such as horsepower, torque, and fuel efficiency. Utilize a dynamometer for accurate measurements. Adjustments may be necessary depending on the results obtained during testing.
Overall, thorough reassembly and testing are paramount in the restoration process of a Porsche 911 engine. These steps ensure that the engine will perform optimally while providing reliability and enjoyable driving experiences.


